


 Reply With Quote
made this last night when I couldnt sleep, found it in the kiln this morning
unfortunately it cracked. not sure how to go about fixing it.


Results 61 to 80 of 207
Thread: All aboard the failboat!
-
07-12-2015, 06:26 AM #61
 uncloseted?


- Join Date
- Nov 2007
- Location
- foothills of the smokey mtns.
- Posts
- 4,566
- Rep Power
- 150
 Re: All aboard the failboat!
Thanks misha and paulsafo.
I'm finding the need to learn repairs more and more as I advance in skills and push my boundaries.
The risk gets higher and higher as we get more technical and artsy so it is to our advantage to learn how to keep things in check when the shit hits the fan.
Plus you always need a new shop rig or a gift so I try my damndest to geterdone if at all possible.
After all this is glass school isn't it.... Originally Posted by mer

-
07-12-2015, 08:15 AM #62
Glass-a-holic
- Join Date
- Oct 2012
- Location
- 978, MASS
- Posts
- 669
- Rep Power
- 18
Re: All aboard the failboat!
instagram - @tomw4
-
07-12-2015, 08:44 AM #63
aka Barry Allen

- Join Date
- Apr 2012
- Posts
- 3,834
- Rep Power
- 59
Re: All aboard the failboat!
slowly heat the tip/rim of the mouthpiece, then attach a blow tube, stick it in the preheated kiln, let it soak for probably an hour, go to town.
or
put it in the kiln bring it up to temp and try to chase the crack out with a handtorch, while it's in the kiln.
i prefer the first approach, more control
cool looking piece ☢
☢
-
07-12-2015, 09:11 AM #64
Glass-a-holic
- Join Date
- Oct 2012
- Location
- 978, MASS
- Posts
- 669
- Rep Power
- 18
Re: All aboard the failboat!
Thanks haven't seen too many pipes that look like that, so I had to give it a whirl. The first method is what I was debating dong. I don't have a hand torch so the second option isn't really an option haha. Im mostly concerned about making the crack bigger instead of healing it when I do in with the torch. Assuming I start at one end of the crack, going towards the other? opposed to starting in the middle? Thanks for the advice, I'll probably try to do this tonight when its not 92 degrees haha. Originally Posted by Clandestine
instagram - @tomw4
-
07-13-2015, 02:18 PM #65
~~~~~~~


- Join Date
- Sep 2014
- Location
- Oceanside, CA
- Posts
- 540
- Rep Power
- 18
Re: All aboard the failboat!
Unwanted air traps while backing pendants....it's been my curse lately...
-
07-13-2015, 03:13 PM #66
Glass-a-holic

- Join Date
- Aug 2012
- Location
- Ny
- Posts
- 2,557
- Rep Power
- 97
Re: All aboard the failboat!
^ Assuming your trapping air as you back it directly with a color rod. You can back pendents another way.
Coil pot a small bubble out of the color you want to back the pendent with. Blow it out to the same diameter as the pendent/marble or slightly larger than the object you will back.
The object will have a punty on the front.
Get the coiled bubble really hot. At the same time, the back of the object heated with about half the amount of red glow. (So it distorts less than the color bubble.) Push the bubble on until it covers the correct amount. Each handle will be opposite each other on the same axis.
Blow out the bubble and carefully tear /cut away the edge. Very similar to a tube implosion, or disc flip.
^ This is the only way I can back it clean every time.Last edited by BORO; 07-13-2015 at 06:51 PM.
-
07-13-2015, 04:00 PM #67
~~~~~~~
- Join Date
- Sep 2014
- Location
- Oceanside, CA
- Posts
- 540
- Rep Power
- 18
Re: All aboard the failboat!
Right on, Boro, and thanks for alternate method. You're correct with how I was backing. I was going to try getting a gather together, smooshing onto the back, and then melting down/flat. But your hollow bubble technique seems much more efficient.
-
07-13-2015, 08:09 PM #68
Glass-a-holic
- Join Date
- May 2013
- Posts
- 71
- Rep Power
- 12
Re: All aboard the failboat!
-
07-13-2015, 11:02 PM #69
Glass-a-holic
- Join Date
- Jul 2015
- Posts
- 18
- Rep Power
- 0
Re: All aboard the failboat!
Ok, now I don't feel too bad. I spent an hour on a dotted spoon, had it condensed really well too.
My first time trying my swivel blow tube set up.. I learned not to puff while I'm in The flame.
I did fire cut the blown out part and made a shorter spoon, looks weird though.
Thanks for making me feel better.
-
07-13-2015, 11:43 PM #70
Glass-a-holic
- Join Date
- Jan 2012
- Location
- Socal
- Posts
- 424
- Rep Power
- 20
Re: All aboard the failboat!
for healing cracks i get it really warm in the kiln like 1100 for a bit and start at one end of the crack working to the other, keep the crack facing downwards so gravity closes it instead of opening it. the slower and smoother you heat up the glass the less the crack will show after. sometimes if the crack isn't all the way through it will disappear just by heating the area slowly and evenly like magic, it kinda spooks me.
cool lookin piece hope it survives.
-
07-14-2015, 12:01 PM #71
Glass-a-holic
- Join Date
- Jun 2014
- Location
- Paonia
- Posts
- 250
- Rep Power
- 13
Re: All aboard the failboat!
Was getting close to completion on this dragon spoon and pow!! Big crack right through the eye, I learned a few things on this, need to reheat more often and I had a couple wierd spots between the eye and the lids. Little gaps in the corners, which I will try and fill ahead of time with white to avoid such issues in future.
Heading away from suckville - http://www.talkglass.com/forum/showt...ons&highlight=
-
07-20-2015, 02:30 PM #72
Glass-a-holic
- Join Date
- Aug 2010
- Location
- Spewgene
- Posts
- 436
- Rep Power
- 26
Re: All aboard the failboat!
yeah I have been working on eyes with lids lately too, but I keep getting air trapped between the lids, or if I get them hot enough to lay down without any (like if i was encasing a tube or something) they end up getting all mushed and flat. It is interesting trying to find a heat where you can still get some nice pronounced wrinkle/lines while still making sure everything is all nice n smooth. More practice, patience and reading is in order I guess...
-
07-21-2015, 05:17 PM #73
SHASHASHAA!!!
- Join Date
- Feb 2009
- Location
- Indiana
- Posts
- 820
- Rep Power
- 41
Re: All aboard the failboat!
You could always carve your lines to redefine them after melting everything in good enough. Should be able to add more detail overall that way anyway, but will take a little longer.
-
07-21-2015, 09:34 PM #74
Glass-a-holic
- Join Date
- Aug 2010
- Location
- Spewgene
- Posts
- 436
- Rep Power
- 26
Re: All aboard the failboat!
One day I plan to get a dremel set up. I s'pose there is always the ole exacto/clay/dental tools for shaping though. That might very well be the answer!
 Good notion sir!
-
07-23-2015, 08:39 PM #75
Glass-a-holic
- Join Date
- Jun 2014
- Location
- Paonia
- Posts
- 250
- Rep Power
- 13
Re: All aboard the failboat!
I am struggling with the lid right next to the eye, if this doesn't go clean and I have to reheat I often melt the lid into the eye and it looks bad. Like you said gomiloboster need more time and practice.
Heading away from suckville - http://www.talkglass.com/forum/showt...ons&highlight=
-
07-23-2015, 09:32 PM #76
steel junkie
- Join Date
- Oct 2014
- Location
- da great white nort
- Posts
- 456
- Rep Power
- 19
Re: All aboard the failboat!
fyi, (for everyone's I) dremel bearings are shit. old ones, new ones, their bearing caging is plastic and the bearings are far from good quality.One day I plan to get a dremel set up.
all of the precision of your rotary tool comes from the bearings.
if you're looking for a rotary tool, get a foredom or an import knockoff with foredom-compatible handles. (and drop a franklin on a foredom handle.)
you'll never notice the difference, because your foredom will never start on fire or destroy the piece you're working on because it started wandering randomly for no reason.
-
07-23-2015, 10:42 PM #77
Glass-a-holic
- Join Date
- Aug 2010
- Location
- Spewgene
- Posts
- 436
- Rep Power
- 26
Re: All aboard the failboat!
Thanks for this advice man, it really is a whole new thing to me, and the only things I know about atm are from peoples posts and setups on the forum with the extender and self contained water bins and the like... Maybe once I get around to finally implementing one I will shoot you a line for some advice if its cool
-
07-29-2015, 10:22 AM #78
SHASHASHAA!!!
- Join Date
- Feb 2009
- Location
- Indiana
- Posts
- 820
- Rep Power
- 41
Re: All aboard the failboat!
Excato's are nice for really fine detail, as long as you aren't working too hot, as they are a little thin, but I really love my old butterknife, and my really sharp pairing knife for doing my sculpting. The old Swiss Army knife comes in handy every now and then as well, but I mostly stick to my butterknife and pairing knife. Never done anything more in glass with a dremel other than carving a sig a couple of times, and I use it with my titanium to sign pieces, so I can't really comment on carving with one, but it sure works like a dream signing pieces with titanium. Pretty much turns a TI pen into a ballpoint pen the way it writes.
-
07-31-2015, 08:51 PM #79
Glass-a-holic
- Join Date
- Oct 2005
- Location
- Pacific Grove, California, United States
- Posts
- 493
- Rep Power
- 20
Re: All aboard the failboat!
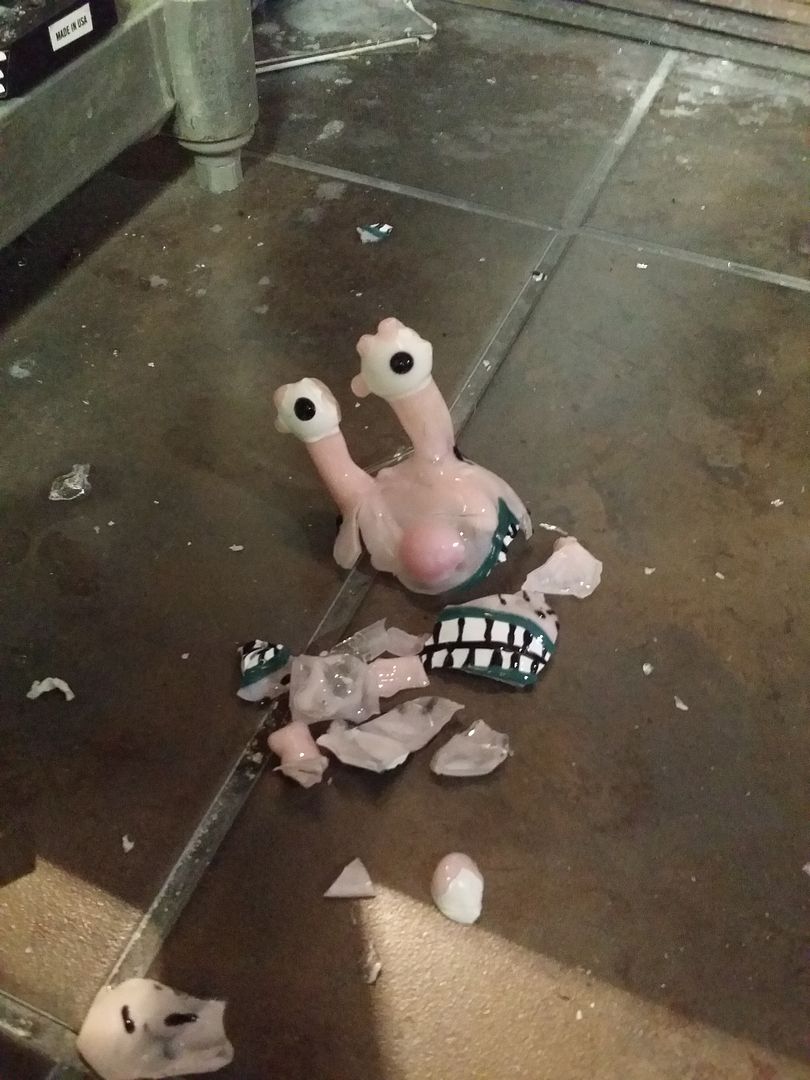
I REALLY wanted to contribute to this thread, so I dug one up.
This one is many years old, but it was so close that I kept it. Everything about it came out pretty close to right - when doing the final round-off (on a VERY lightly attached punty) and it dropped on its face (onto hardibacker, so it left a bunch of crap on the glass that becomes visible when it's heated). *sigh*
-
08-01-2015, 06:18 AM #80
(bulletproof)


- Join Date
- Jan 2010
- Location
- Flint, Michigan
- Posts
- 2,214
- Rep Power
- 68
Re: All aboard the failboat!
Woops....
"Never open your mouth, unless you're in the dentist chair."
-Sammy 'The Bull' Gravano
Bulletproof Glassworks LLC
http://bulletproofboro.bigcartel.com
BulletproofGlassworks@Gmail.com
www.instagram.com/BulletproofGlassworks
#BulletproofGlassworks @BulletproofGlassworks


 Posting Permissions
Featured Member's Spotlight!


Donate to our forum!
Bookmarks